Sharing a love for party planning and entertaining.

Monday, June 25, 2012

Decorations for Game Night

So I wanted to show you all a new decoration that I made for my church's upcoming Game Night.  This is just a sneak peak into the event decoration, but I thought it was very clever and gave it a shot.  I'll post some other ideas for my game night later this weekend, and then post the final event pictures next week.

Dice
For a game night, I was searching around for ideas on how to decorate.  Of course I'd thought of using game pieces and such, but wanted a more adult feel, so I thought of using cards and dice.  While searching through images, I found one of a large box painted like a piece of die, so I made some that I think will work great. 


Directions are very simple. 
  • Step 1:   Purchase shipping boxes from your local packaging store or from an office store, such as Staples, Office Max, or you can even get them at WalMart.  I had to purchase brown boxes and paint them white, but buying white boxes will save you a lot of time, but they will be more expensive.  If you decide to paint brown ones, make sure to use paint, not spray paint. 
  • Step 2:  If using brown boxes, shape the boxes and tape them with clear shipping tape.  Paint the boxes (use a small roller and basic white paint).  If using white boxes, shape the boxes and tape them with white duck tape.
  • Step 3:   Find a circular shape to trace the dots on the dice.  Make sure that the shape is balanced to the size of the box.  As you can see above, I made different size dice, so I had to find different circular size shapes to match the boxes. 
  • Step 4:   Trace the circular shape onto the boxes with a pencil, making sure to follow the pattern of a die. (I pulled a pair of dice from our Monopoly game:) 
  • Step 5:   Fill in the penciled in circles with a permanent black marker.  I used a Sharpie Magnum Marker that had a fine enough tip to trace the boxes but a large enough tip to fill them in without it taking a whole day. 
I plan on stacking these around the room.  So stay tuned for more on how these will be used for my Game Night, including picture! 

Tuesday, June 12, 2012

Superb Idea of the Week: Tissue Poms

Tissue Poms

I think Tissue Poms are one of the neatest, cheapest, funnest ways to decorate for a party on a low budget.  Heck, I'll still use them on a large budget!  But please, give these a try on your own before you shell out double the price on packaged tissue poms.  With only four items (2 of which you already have at home), you can make your own tissue poms that look much better than a packaged version!

There are a lot of websites out there that show you how to make poms, and lots of youtube videos that can help you out.  I've posted a few of my favorite videos and a couple pics of my tissue poms. All you'll need is a package of tissue, scissors, a stapler, and some clear fishing line.  That's it!!!

Try this video:

How to Make a Tissue Pom

Jenny does a great job at showing each step. I will add a couple points of my own here.
  • Jenny used 9 sheets on her large pom.  I use 10, because I like mine very full.  For a medium size pom, I cut the sheets in half, and use 8 of them.  I've also done small poms, at about 1/3 of the large size and use 5 sheets.  Give each size a try.
  • I staple my poms in the middle once I fold up the sheets.  It holds them together well.
  • I use clear fishing line and wrap and staple around the middle of the pom so that I can hang it up after seperating the sheets.  Make sure and do this right after stapling.
  • Like Jenny says, you can round or point the ends of the poms.  I prefer the point look, but try what you like!
Another youtube video I watched was this one.  Distracting, but you get the idea:

Purple Pom

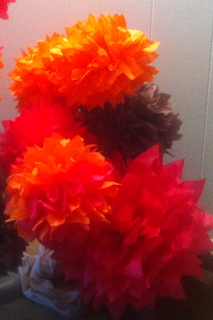
Here are a couple of my pics:
You can see here the difference in sizes.  I made large, medium and small.


These small poms I just placed on the tables as decorations.
So give tissue poms a try.  They would work for weddings, baby showers, game nights, graduations, anniversaries, etc!  Enjoy!
Ingrid